Tuesday, December 31, 2013

Scrap Our Stash - December Stash Challenge

Hi All - I hope you had a Merry Christmas and are getting ready for the new year! We are trying to get the house back in order and doing some cleaning today..not fun but love when it is done. Anyways, I am sharing a layout I made for the December Scrap Our Stash Challenge. I unfortunately did not get it posted in time to link it but still thought I would share.

The challenge was to use a phrase from a piece of Word Art posted on the blog and use 4 photo corners. I used the phrase "We are Blessed" and used 2 pick and 2 yellow photo corners. For the rest of the layout, I used items from the Studio Calico Blue Note Scrapbook kit and Project life kit as well as the Bennett Add-on and Armstrong Add-on. The background paper is called Flashback and is from the Recorded line by Allison Kreft for Webster's Pages. (The picture is a little blurry but I just realized this and the layout is now with my mom as it was part of her Christmas gift - so it is what it is!)


The "we are" was written by me and then cut with my silhouette. To do this, I first wrote the word with a black sharpie on a white piece of paper. I scanned it in to my computer and then opened it in my silhouette software. I then traced it to give it cut lines and then had the silhouette cut it out. I used gold POW paper from American Crafts. I find this is usually faster for me than looking for the "perfect" font when I have what I want in my head.

Make sure to check out the winners of the Scrap Our Stash challenges from December which are posted on their blog today - Congrats to the winners!

Hope you have a fun New Years Eve - Thanks for stopping by!
Megan

Wednesday, December 25, 2013

Merry Christmas!

Hi all! Since it is Christmas Day, I thought I would share our Christmas card from this year. I used one of Becky Higgins' free templates. You can find them HERE. There were a lot of cute designs. I decided on this one mainly because I needed one that worked with a horizontal picture.


I hope you all have a Merry Christmas! Thanks for stopping by!
Megan


Sunday, December 15, 2013

Scrap Our Stash Design Team & a Layout


A few weeks ago I was asked to join the Scrap Our Stash Design Team starting in January and said yes almost immediately! Since I found their blog, I have really enjoyed doing their challenges and they definitely help me use up some of my supplies. They announced the new team on the blog yesterday, which you can see HERE. I hope you check it out and play along with the current challenges, which you can see HERE.

Also, today I wanted to share a layout I made awhile back of Eli and his cousin, Micah. These two are about 17 months apart and are inseparable whenever they are together. We live about 7 hours away so it is not often. They are always, always copying each other!

I found this background paper when I was re-organizing my stash after our move and knew I wanted to use it because it is just so pretty! The paper is from Cosmo Cricket and a lot of the other items are from Dear Lizzy Polka Dot Party.


I hope you are having a good weekend...What is left of it anyways...The weekends go by too fast! Thanks for stopping by!
Megan

Monday, December 9, 2013

Christmas Memories / December Daily - Day 1 & 2

Today I am sharing the first page of my Christmas Memories (or December Daily) album, as well as Day 1 & 2. (You can find out more about December Daily on Ali Edwards'  blog.) I am calling it Christmas Memories instead of December Daily as I am trying to just document the memories around our holiday. Also, I am trying not to be too strict on the days, but so far, I have had a page or spread for each day so I may stick to daily.

I am mainly using the December Daily kit from Studio Calico. I decided to use the Studio Calico Magical Handbook though instead of the Handbook from the kit. It was just cute not to buy! Here is my first page and Day 1 and 2:

For the cover, I colored the "25" wood venner with Prima Fluid Chalk Edger ink in Lady Bug. The transparency is one from Hambly that I picked up from an Archiver's a few months ago. The round letter stickers are from October Afternoon. The rest is from the kit I am using. I decided to go ahead and put the transparency in a page protector because my boys are rough on things and I wanted them to be able to look at it without it tearing apart (well immediately, anyways)...

These are some of the 6x8 papers in the kit cut to 3x4. I just left them plain to give a cute backdrop to the transparency.

This is a spread of my day 1 & 2. Some days I plan to do a whole spread, but others will just be one side.

Yes, Eli named our elf, Eli. Awesome...I am guessing other kids do this as well??? hopefully! Anyways, the silver letters are from Target's $1 bin. Everything else is from the kit.

This page is documenting my work's charitable Christmas project. The "2" is from glitter Thickers from the Maggie Holmes collection. The stamp on the journal card is from Technique Tuesday. The red "Yes" letters are from Simple Stories Snap line. The grey letters are from Target's $1 bin.

My book is caught up through Friday. As you can probably tell from my pages above, my plan is to keep it simple so it will actually get done this year. I love all the December Daily albums with lots more embellishments but for me, I have to keep it simple to get it done.

Happy Monday and thanks for stopping by!
Megan


Monday, December 2, 2013

Sweet Cousins

Happy Monday! I cannot believe December is already here! Seriously, where has the year gone? Nevertheless, I am excited to get started on my December album. I am still deciding if I want to do daily or just include 25 memories. I am not the best at the Daily thing....hmmm...we shall see.

Anyways, today I am sharing a layout I made a month or so ago that I just have not gotten around to sharing yet. (I actually have quite a few of these.) I found the background paper for this layout when I was reorganizing my paper at my new house. I picked up the Studio Calico Penn Station add on during a Last Call sale and this paper from Glitz Design came with that kit. (I actually broke up the kit when I got it but still ended up using some other paper that came in the kit...kind of funny when that happens!).

As soon as I saw the paper again, I really wanted to use it right away so I set it aside and thought about a picture I could use with it. Since it is rather "girly", I did not think it would go that great with my everyday pictures of my boys. I ended up using a picture of Max with his cousin, Mia, who he adores! She is about 6 years older than him and he thinks she is the greatest thing! Here is my layout:


I really like how it turned out. I used various items from my stash so if you have a question about a particular one, just let me know. Thanks for stopping by!
Megan

Tuesday, November 26, 2013

Teacher Cards

Hi - I just wanted to pop in today and show a picture of some cards I made for the boys' teachers. Max switched classes recently so I wanted to give his "old" teachers a card and a gift. I also ended up getting Eli's teachers something as well because they have been so great! I normally don't do Thanksgiving gifts, but I am so very thankful for them that I thought I would do that this year. (By the way, I typically get gift cards to Target as I have had many teacher friends and they always seem to like that...)

Here are the cards:
I mostly made these with the Studio Calico Antiquary Card Kit - I think I have said this before but this is definitely my favorite card kit so far. There were a lot of great projects in the design team gallery for this kit and these two in particular inspired some of my cards - Happy Happy Birthday to You by Lisa Spangler and  Happy Birthday to You by Maile Belles.

Thanks for stopping by and hope you have a great Tuesday (and are staying warm - it is cold and supposed to be snowy here in the Nashville/Clarksville area!)
Megan

Saturday, November 23, 2013

Layout for Scrap Our Stash Challenge #9

Today I am sharing a layout I made for the Scrap Our Stash Challenge #9. As soon as I read about the challenge earlier this month, I thought of using my 6x6 pad to make a border around the layout, which is something I had not done before. I got some time the other night to try out my idea and I like how it turned out. I mainly used the Echo Park All About a Boy 6x6 pad, as well as some from the Fancy Pants Trendsetter 6x6 Paper Pad. The "title block" even came from a paper in the All About a Boy pad. My 6 or more premade embellishments are enamel dots from Basic Grey and My Mind's Eye.  Here is my layout:


I printed the words from a song by Darius Rucker on the layout. I changed the wording a bit to make it geared more towards a boy vs a girl. I heard this song on Max's birthday when I was at work and listening to Pandora...Of course, it made me cry to think about how big my "baby" is getting. (He turned 2 this week.) I wrote the journaling at work in a small notebook I had with me (it references the song). I wanted to leave it as is, so I just tore it out of the notebook, cut off the edge, folded it and stuck it in a small paper bag from Fancy Pant's Trendsetter collection.

The other items I used on the layout were: Studio Calico Handwritten Star wood veneer, American Crafts Valentine's roller stamp from Target, Hero Arts Shadow Ink in Navy, Fancy Pants Fundamental Stickers and Label Stickers, Tag from office supply store, and Recollections Lace on a Roll from Michael's stores.

I have said it before, but I really like the SOS challenges as they are not too constraining. I hope to get time to do their sketch challenge as well this month as I already have an idea for it...

Hope you have a great weekend. Thanks for stopping by!
Megan

Monday, November 18, 2013

Layout with Gossamer Blue July Kit

Hi All - I hope you are having a good start to the week. I did not get to scrapbook as much as normal last week as most of my "free" time was taken up by running around getting items for Max's birthday party and trying to get the house in order (still working on this from our move) and cleaned up for the party. We had a fun time but I was exhausted by the end of the day. I really can't believe he will be 2 on Thursday...Trying not to think about it too much or I might start tearing up :)

Anyways, since I don't have any new layouts from this weekend to share, I thought I would share a layout I made with the July kit from Gossamer Blue. I got their June and July kits and have made a few layouts from them but definitely need to make time to work with them some more because they are great kits!  Anyways, I think I made this layout in late July or early August. Most of it was made when I was at my parent's house when we had a showing, so I really only had the kit and a few other supplies I threw in my bag - so most of the supplies are truly from the kit.

I got the July Main Kit and July add-on 2, so you will see supplies from both of those in my layout.

I loved the die cut pack from Fancy Pants and used quite a few of those on my page.

The picture is a phone picture so it is a little blurry, but I wanted to scrap the memory - even if the picture is not perfect. I doubt my kids or I will care later on :)

I have to say that I love that the main kit came with two alphabets - one set of Thickers and one sticker sheets with alphas, as I typically like to have more than one kind of alphabet on my page.

...And the journaling...such a weekly occurrence that I am glad I documented.

Happy Monday! Thanks for stopping by -
Megan


Wednesday, November 13, 2013

SC Lifted - Week 2 Lesson 1

Hi All - I hope you are having a good week so far. I was able to do 5 layouts last week related to the Lessons in the Studio Calico Lifted class, as well as another layout I "lifted", so that was 6 layouts last week! (You can see them all in my SC Lifted Gallery.) Quite a lot for me. It has been a lot slower this week as my week has just been busier. However, I did get a chance to work on and finish a layout today for Week 2, Lesson 1. This week's inspiration layout was all about circles. I have to admit it has been a LONG time since I have done a layout where the picture was cut into a circle, but I gave it a try and I liked the result. I also took a few progress pictures along the way. Most of these were for my own benefit on my iphone so I could remember where I wanted to place things when I was gluing them down, but I thought I would share those as well.

I first cut my photo into a circle. I used my Sizzix Big Shot and wafer thin circle dies also from Sizzix. I like these dies because you can see through them and see where your photo will cut.


I chose to go with navy, red, orange and yellow as my colors. I pulled these colors from the clothes the kids were wearing in the photos. I basically just went through my scrap paper bin and found a bunch of papers in those colors. I chose to go with papers that were mainly just those colors (i.e. no multicolored prints). I just thought this would be easier to work with.
After I cut the circles I laid them out in various arrangements that I was happy with. I did look at the sketch provided for the lesson along the way but my circles ended up in quite a different pattern than the sketch.

I glued the circles down. Some of them I put on 3D Foam Squares to give a little bit of dimension. At this point, I decided I want to add another shape and went with the handrawn wood veneer stars from Studio Calico (my new favorite embellishment!). I decided that I wanted a darker wood look to add some more contrast. So after I placed them down, I took a picture so I could remember where I had them arranged. I then removed them and inked them with Prima Chalk Fluid Edger ink in Knotted Wood.

I also decided that the white background was a little "too stark" so I ended up adding drops of SC Mr. Huey in various places on the page. I used a navy, yellow and orange-red color. Later, I ended up adding some enamel dots in orange and some rhinestone stickers in brown to go along with the splatters.


After this, I glued down the stars and added the title. Looking at the page, I felt it needed something at the top and bottom, so I cut a little off the top and adhered the page to yellow patterned paper. I then added a strip of red at the top and orange at the bottom.


I am pretty happy with how the layout turned out though it pushed me out of my comfort zone by having to use circles. Hopefully my process/line of thinking helps you a little bit and maybe encourages you to try something new in your scrapping!

Also, I thought I would leave you with one final picture - I got Eli some kid stamp pads today, and he was stamping and coloring as I was working on my layout. (He is often across from me painting, cutting, gluing or coloring!) I praised him for how well he was stamping and he said "Yeah Mommy, I stamp better than you!"


Thanks for stopping by! 
Megan

Tuesday, November 12, 2013

Thoughts on Kits

Hi All - I thought I would share a little bit of my thoughts on kits today. I listened to the Paperclipping Roundtable episode on Kits and it really got me thinking as to why I like kits and what makes them a good option. (Also, I am referring to kit clubs in this post not really kits you put together yourself or a collection kit.)

I just got back into scrapbooking "regular" layouts (i.e. not Project Life) about a year and a half ago. I subscribed to Studio Calico's scrapbook kit when I started scrapbooking again. I have also tried other kits as well. All I have tried have been great clubs but I ended up with Studio Calico Card kit as my ongoing sub (which I explain why later in the post).

Here are some of the main reasons I like kits:

- A good jumping off point - Whenever I want to create a layout, about 1/2 the time I start with a kit. For me it is a "good jumping off point" - meaning I rarely just stick to the kit contents but it definitely gets me started which can be one of the hardest things.

- Have someone select the supplies you can't "see" - This one has really hit home recently since Archiver's in my area closed. I really don't have a place where I can physically see products. Hobby Lobby has a few of the newer items, but that is it. I know I have bought things online that looked better online than in person and vice versa. Buying a kit they find those supplies for you as they do get to see the physical product. For example, I wasn't really sure about Studio Calico's new Printshop line but I got a few of the products in a kit and was sold - It has been one of my favorite new lines!

- Supplies I wouldn't have bought on my own - A lot of times you get things you would not have bought on your own in the kit, whether it be because you don't think it is your style, not very readily available or maybe the price point as they sometimes do partial packs. This has pushed me to find things I wanted have tried on my own and find things I really like.

- Creative Team Galleries - Kit clubs all have creative teams that make layouts with the kits. You can view what they did with the supplies and get ideas - or even exactly copy a layout. This can help when you are first scrapbooking (or scrapbooking again!).

- Exclusives - This is probably why I decided to on the SC card kit as the sub I wanted to keep. I do make cards but not as much as layouts but I love their exclusive 6x6 pad and the stamp set. I use the paper and stamp sets for cards and for Project Life, as well as layouts. Also, SC has a lot of different exclusives that come in their other kits. I have the option of purchasing those as well during presale (or after) and they will ship with my Card kit as long as I buy between a certain time period of the month.

I do think the key is to find the kit that works for you. They talk a lot in the Roundtable episode about this. The reason I ended up sticking with Studio Calico was I find their kits the easiest to use for me and they have items I can't purchase otherwise. In addition, they have a decent size shop where you can buy extra supplies, combined shipping from the 27th-end of the month, and quick shipping to me (I only live about an hour from them so I always get my package the next day).

If you want to check out a good listing and review of kits, check out Ruth Bosner's blog where she did a great job of breaking down kit clubs. It is a little older but most facts are still the same. (She also did one on pocket page kit clubs that you can find HERE.)

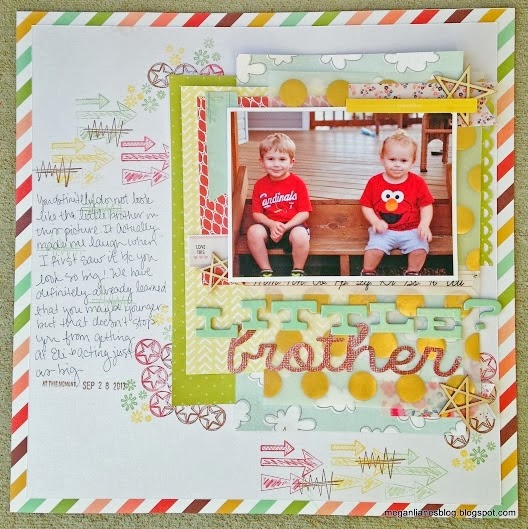
I will leave you with a layout I made with (or at least started with) the Studio Calico Marks & Co Scrapbook and card kit. I ended up getting the main scrapbook kit that month as well as the card kit. (I usually purchase at least one add on or the main scrapbook kit with my card sub.)
The Amy Tangerine pocket is a good example of something I would not have purchased on my own but actually really liked using on this layout. We also got a partial pack - just two pockets in this kit.

The Studio Calico bow from their Atlantic line was actually another item I received in a different kit that I most likely would not have purchased. I really like what it added to this layout.

The yellow letter stickers are by Bella Blvd. The glitter dots are from Freckled Fawn

The die cuts and sticker are from the Dear Lizzy Polka Dot party line from my stash.

I used the pocket to hold my journaling. This card came from the Amy Tangerine Cut & Paste die cut pack also from my stash.

I hope this gave you some insight into why I like kits. If you haven't ever tried one, I say give it a try! Most you can buy just the single kit so you can try it out.

Thanks for stopping by - Hope you have a happy Tuesday!
Megan


Saturday, November 9, 2013

SC Cuppa Kit Layout and SC Lifted Layout-Lesson 5

It is late here, but I am up as I just got back from my husband's high school football playoff game. We had to play the #1 team in the state and ended up losing pretty bad. Honestly, we were really just happy to make the playoffs as this is Brian's first year as the head coach, and he got a late start with everything. It is so odd when football is over around here because our lives go from super-super hectic to back to somewhat normal (I guess...I mean how normal is life really when you have a 3 year old and almost 2 year old running around destroying your house all the time?)

Anyways..I am sharing a couple of layouts I made yesterday and today. One is a layout I made with Studio Calico's November kit - Cuppa (love this one and just got it yesterday!) and the other is another layout for the Studio Calico Lifted class, which also uses a lot of Cuppa.


This layout was definitely inspired by/partially lifted from Catherine Davis' layout with the same title - You can see it HERE. I loved how she used the clocks and the number stickers to show her little girl at age 1, 2 & 3 - so I did the same for Eli - but used a different format.

"Flies" in the title was cute from my cameo. The blue circle behind the number sticker was punched from some coordinating paper included in the card kit. The arrows are stickers from SC's Here and There line.

I measured each of the frames I was going to use and then cropped the photos in Photoshop Elements to fit each frame. To make sure each picture went well together, I used a Photoshop Action to give each one the same "colors/tints". (The one I used is from Two Peas - Adrienne Looman and is called Soft Tea.)

This next layout was made starting with the Sketch from Lesson 5 of SC's Lifted class. The lesson was more about lifting a color scheme. I ended up lifting color more from the sample/created layout than the original layout.


How cute are they in these costumes? They loved them so much that they slept in them some when I first got them. Side Note - for having boys, I tend to deal with fashion issues regularly...so I choose my battles. Eli has worn about everything to bed..including swim trunks and swim shirts. This is why I am not even fazed when I see a kid wearing a Teenage Mutant Ninja turtle costume at church in the middle of summer.


I realized I forgot to write the date in once I took the picture so I will have to add that.


I absolutely loved the sticker sheet in this Month's main kit...I hope they include more of these.

Also, in case it is of any interest to you, here is what I picked up kit-wise from SC for November:

I also ended up picking up a few sheets of paper from the Add-ons as well - the ones I really was loving. (I picked them up from another online retailer.) Also, there are definitely items from my stash on these layouts as well so if you have questions about any items, feel free to ask.

Well that is it for this Friday Night/Saturday - I hope your weekend is a good one!

Thanks for stopping by -
Megan


Thursday, November 7, 2013

SC Lifted Class - Lesson 4

I am sharing the layout I made for Lesson 4 of the Lifted Class at Studio Calico. I made another 8 1/2 x 11 layout - I am definitely enjoying this size! The layout for this lesson was by Kelly Noel. She is definitely one of my favorite scrapbookers - her style is great, as well as her photography. I basically lifted her layout - If you are taking the class, you can see that my layout is fairly similar to hers in a lot of ways.  (If you aren't taking the class, it was in the sneaks so click here to see a peak - hers is in the middle, the theme one.)

I mainly used the Studio Calico Double Scoop kit for my layout. I really like how you can pull soft or bold colors from the kit.


I loved the "I solemnly swear I am up to no good" stamp set from the SC Add-On Big Dipper but had just not used it yet. I thought it went pretty good with this picture of Eli sitting in a pile of toilet paper that he just pulled off the roll. We basically could not keep toilet paper on the holder when he was this age. I have multiple pictures of him just taking the whole thing off. Luckily, Max was not as interested in this - however, he tends to destroy other things so I guess he has plenty to keep him busy :)

I changed the picture to black and white because the colors were not the best and I wanted to use softer colors. The stamp is embossed with white embossing powder. The woodgrain paper is from SC's Christmas line from last year - Wonderland. I found a pack of 25 sheets for $2 at Tuesday Morning so I snatched it up! I love the dark woodgrain and the other side is a great pattern, as well.

Hope you had a great Thursday - thanks for stopping by!
Megan


Wednesday, November 6, 2013

SC Lifted Class - Lesson 3

Hi All - I am sharing the layout I made for Lesson 3 of Studio Calico's lifted class. I mainly just used the sketch as my inspiration but added some vellum in as well. (I used some of my hoarded Dear Lizzy gold polka dot vellum - They really need to make this vellum again!!) The picture is not the best ever as I just used my iphone so I could get it quickly uploaded this morning before heading to work... Nonetheless, here is my layout:


I mainly used the SC Double Scoop main kit for this one but added in some items from my stash. The stamps I used on the background are from the Scraptastic Found a Boy stamp set. I have really loved using some of their stamp sets for background stamping. If you have any questions about anything else I used, feel free to ask.

Thanks for stopping by!
Megan

Tuesday, November 5, 2013

SC Lifted Class Layouts - Lesson 1 & 2

Hi All - Hope you are having a good Tuesday. Before November started, I thought about trying to do my own LOAD (layout-a-day) this month. However, I kind of realized with my work schedule, etc, it would probably not work. I did decide to take the Lifted class at Studio Calico, and I am challenging myself to keep up and create a layout for as many lessons as I can. My main motivation behind doing this is to continue to figure out more about my style - what I like, what I don't like - and of course, to use up some of my stash.

I am sharing what I made for the first two lessons. The first one, I really like. I had looked at the lesson a day or two before, so the idea of this one had been in my head for a little while. Because of that, it came together quickly, and I love how it turned out. I haven't done 8 1/2 x 11 in awhile and really enjoyed doing that size.

I mainly used Studio Calico's Atlantic line for this one.

I struggled more with the second one. In the end, I like it but not sure I would have added the sequins. They are there and would be difficult to take off so I am not messing with it but just taking a mental note of it.
I used Studio Calico's Snippets and Sundrifter, as well as Carta Bella Hello Again for this one.


I hope you are enjoying the beginning to your week and are fitting some crafty time in, as well!
Thanks for stopping by!
Megan

Monday, November 4, 2013

Driving the Jeep Layout - Using Studio Calico Antiquary Kits

Happy Monday! Today, I am sharing a layout using the Studio Calico Antiquary kits. I did not get the main scrapbooking kit this month but I did get the More Patterned Paper, which includes all the patterned paper in the main scrapbooking kit. I subscribe to the card kit so I got that, as well as the Project Life Add-on - Dublin. You will see all of those kits mixed in on my layout, as well as items from my stash.


I really haven't done much typed journaling but I love how Kelly Noel does this so I decided to try it out on this layout as I had a lot to say in a little amount of space. I like how it turned out.


I was really not sure how I was going to use that canvas heart but really like what it added to this page. Also, these star wood veneers from Studio Calico's new Printshop line are my new favorite. They are the perfect embellishment for boy pages!

Hope you are having a good start to the week. Thanks for stopping by!
Megan


Friday, November 1, 2013

Easter Egg Hunt - Studio Calico Marks & Co. Layout

Happy Friday! Today, I am sharing a layout I made mostly with the Studio Calico Marks & Co. Scrapbook kit. I only subscribe to the card kit but I had to pick this main kit up - loved it!

I loved, loved, loved the purple paper so had to make sure I used it as a background.

This picture is not the best of the boys but I am definitely going to scrap any picture of me with them as I don't have too many of those - since I am usually the one behind the camera. I die cut the cork star from adhesive cork paper I found at Michaels and THIS DIE from papertrey ink . It is one of my favorite dies.

I used letter stickers from my stash. The "egg hunt" was from a Webster's Pages sticker sheet. The color was lighter than I wanted, so I colored them with alcohol markers to get the color I wanted. I used some American Crafts Chromatix. I got this tip from Melissa Stinson at Scrappy Jedi. You can do this on chipboard thickers as well. It definitely helps when you need a color you don't have.

Hope your Friday is a good one - Thanks for stopping by!
Megan


Wednesday, October 30, 2013

Scrap Our Stash Challenge - Awesome Bike

I am sharing a layout of my son, Eli, that I made for the Scrap Our Stash Challenge this month. The Challenge #8 was to pick three items in a row from the following tic-tac-toe board:

My layout covers the 3+ buttons, decorative pins and wood veneers. Here is my layout:

I used a lot of My Mind's Eye Boy Crazy on this layout - a perfect collection for boy pages.

I lined up my photo on the right edge of the paper. I have been wanting to try that design (where the photo touches the edge) for awhile and finally thought I had a picture where it worked pretty well.

I colored the Studio Calico Wood Veneer bikes with Prima Chalk Fluid Edger inks - love these inks!

And the journaling...kids can be so funny!

Hope you are having a good week - Thanks for stopping by!
Megan